Sunday, July 22, 2012

Chamorro and Portobello Burgers


Well this past Wednesday (Wednesday's are burger night in our home) I decided to come up with a burger that justs shouts out, "This is Guam". Naturally I name the burger the "Chamorro" Burger. Chamorro is the name for the indigenous people of the Mariana's Islands. 

The challenge here was to use ingredients that are common to Guam and loved by all. So I came up with a burger that started out with locally made Pork Chamorro Sausage and served in between two pieces of the local "flour titiya". These are basically a 14-16 inch by 1/4 inch thick flour tortilla with a little sugar and coconut milk added in the dough.

So let me get started on how I brought this all together....

Bought about a pound and a half of Pork Chamorro Sausage. It is a special spicy blend available at most grocery stores here on Guam.

Next I mixed in my fresh herbs from the garden. 


Mint, Oregano, Cilantro flowers and hot pepper.

All the herbs and hot pepper plus one egg and freshly ground black pepper are in the food processor ready for mixing except we need one more item....

On heaping tablespoon of Finadenne Denanche, Guam's hot pepper paste. I don't want anyone falling asleep while they're eating their burger.

Blended all this in the food processor. Then I add about a cup of Japanese Bread Crumbs (Panko) for a binding element and mixed this all together in a large bowl.

Slap the patties on the grill and cook to your spec. Lupe likes her's well done and I like my patty medium.

This puppy is ready to come off the grill.

Also grilled some portobellos for my wife Lupe because she didn't want a bun. Guess what she used for buns???

This is what I used for my buns. Guam's local flour Tatiyas.

Here are Lupe's portobellos being served.

Here is Lupe's Chamorro Burger using the portobello mushrooms. And no matter how hard I tried, I couldn't find two Portobellos the same size. Oh well, didn't bother Lupe one bit.

Here is my Chamorro Burger ready to be put together. It is served with Lupe's Garden Fresh Salad and home made Potato Skins.

I just had to take a break from taking all these pictures and bite my burger before I resumed my photo chores. Dang was this burger delicious and hot!!!

Lupes' Fresh Garden Salad. This is also what I used on my burger.

And here are the grilled Potato Skins.

Well, Lupe told me that this was the best burger she had ever eaten. She also told me that from now on she wants Portobellos on all her burgers. No more buns for her. As for me, the heat factor on the burger was great. Not a killer heat where I could not enjoy my burger, but enough heat that it drew a little sweat on my face and gave me the hiccups. That means it was delicious. 

All this with another one of Lupe's Garden Fresh Salads and those grilled Potato Skins. This went down in our burger book as the best so far. 

People!!!!!.........as my late Uncle Sal used to say, you have got to try this. You can always kick the heat factor up a bit by adding a few of those million plus scoville unit hot peppers into the mix. Up to you if you want to melt off all your hair follicles from the inside.

Whew!!!!! This was a gooder!!!!

Unit next time....

Saturday, July 14, 2012

Pork Spare Ribs Adobo


If you have never tried Pork Spare Ribs Adobo, you are missing out. This is a dish that you will never forget. It doesn't take long to prepare. And you are more than rewarded for that effort by the absolutely mouth watering and smooth flavor of this dish. And, let me warn you now, you will find yourself sucking the meat and sauce right off the bone. 

Pork Spare Ribs Adobo is a multinational dish. You will find it in Latin America, as well as Asia. There are so many different twists to the recipe. But one thing is for certain, regardless of the recipe, they are all outstanding. Here is mine....

Pork Spare Ribs Adobo 


Ingredients 
  • 1 rack of spare ribs cut into 3 inch pieces.
  • 1/2 cup soy sauce (Kikkoman).
  • ½ cup of water.
  • 1 cup apple cider vinegar.
  • ½ medium onion, diced.
  • 6 cloves of garlic, diced.
  • 1 tbsp ground black pepper.
  • 5 bay leaves, crumpled.
  • 1 cup of achote seeds soaked in water, or 1 package of achote powder (like Mama Sita’s brand).
  • 2 to 3 tbsp of olive oil or just enough to cover the bottom of the pot.
  • 1 large potato cubed cut into ½ inch cubes (optional).
  • 1 small can of tomato sauce (optional).
Instructions 
  • Cut up, rinse and drain the spare ribs
  • Cut the onions and garlic
  • Heat oil in pot over medium heat.
  • Sauté the onions, garlic and black pepper.
  • Add the spare ribs, turn heat to high and brown the spare ribs.
  • With the heat remaining on high add the rest of the ingredients except the optional items.
  • Crumble up the dried bay leaves when adding.
  • Bring to a boil, then cook another 5 minutes, before reducing the heat to low.
  • Cook about 20 minutes more, stirring constantly, then add the cubed potatoes and tomato sauce at this time if you are going to use them.
  • If you do use the tomato sauce, then eliminate the achote.
  • Cook another 10 minutes until the potatoes are cooked but not disintegrating.
  • The spare ribs should be cooked tender but not falling off the bone. Just firm enough to stay on the bone.
Serve with steaming hot white rice and lemon finadene. Here is the recipe and instructions for lemon finadenne':


Note: For the achote coloring, you will soak the achote seeds in two cups of water, stirring constantly until the water is a deep red color. Once you are satisfied with the color, then you can add the achote water in with the rest of the ingredients at the proper time.

This adobo is so good, you will find yourself making numerous trips back to the pot. And like some dishes, it is even better the next day. So you might want to double up on the recipe, because I am sure this won't be enough for the family.

Hope you enjoy the Pork Spare Ribs Adobo as much as we do!!

Until next time....

Thursday, July 12, 2012

Firehouse Burgers.....A little taste of Heat!!


Well we enjoyed another weekly burger night as is the custom every Wednesday night. And this week I threw down some Firehouse burgers. Of course being a firefighter had nothing to do with it.

This burger had to be hot!!! But as with anything I cook, it also had to be palatable. I mean, come on now, I am not cooking for the frat boys at the bar. So here is how I prepared and cooked this burger.

First off I use regular ground beef. I don't use lean because it is not nearly as juicy as the fattier regular ground beef. It weighed in a little over one pound. I mixed in one heaping tablespoon of Donne' Denanche (Guam Hot Pepper Paste).


I chopped up about 3/4 cup of fresh cilantro and mixed this in the ground beef. It was already looking and smelling good. 

The last addition was adding freshly ground black pepper. No measurement here. Just to my liking.

I let this sit in the refrigerator for about 4 hours. I wanted to make sure everything blended well. 

You probably noticed that I didn't add any other seasoning or salt. I usually only do this when the burger is just about done cooking. Salt has a tendency of toughening up meat. That is why I add it, if needed, just prior to removing the burger from the grill.

Come grilling time, all I had to do was insert the hot peppers into the meat. Because my wife Lupe loves her patties thin, I placed her peppers on top of her patty. On thicker patties like mine, it is easy to insert the peppers into the middle. Just use a chop stick to poke a hole into the patty and insert the pepper. Insert as many as you like.


Grill your burger and buns.


I used 100% whole wheat sesame buns for this go round. I like to change up the buns every Wednesday also.


I caramelized the onions with slices of jalapeno peppers in butter and hot chili oil. You can buy hot chili oil at the store usually in the oriental section. This was a great addition.


Now here are the fixings and condiments. Iceberg lettuce for my burger and green butter lettuce for Lupe's. Chamorro (name for the indigenous people of Guam) pickles aka Jalapeno slices, tomatoes, baby sprouts, pepper jack cheese, caramelized onions, and the usual ketchup, mayo and mustard.

This was served with onion rings and Rueben's Slaw on the side.

Onion ring batter consisted of buttermilk, buttermilk pancake mix, self rising flour, one teaspoon sugar, salt, black pepper, onion and garlic powder, cayenne pepper and smoked paprika. Of course the onion rings were dipped and deep fried to a nice golden brown.


All in all, another great burger dining experience. Well except for one thing......Lupe said the burger wasn't hot enough for her so she had to munch on some fresh hot peppers picked right off the hot pepper tree. She is my Hot Tamale!!!


Lupe wasn't doing too much talking at the dinner table.

Next Wednesday's burger.....the Chamorro burger. Chamorro is all about heat and this burger will make the Firehouse burger look like an Popsicle.

Until next time....

Thursday, July 5, 2012

Smoked Yellow Fin Tuna Burgers


As some of you may know, every Wednesday in our home is Burger Night. We grill up a different burger every week. This week was no exception.

I had some smoked yellow fin tuna left over from a while back and decided to throw down some burgers with it. Here is how I prepped the tuna...

I put a few smoked tuna steaks in the food processor, along with two chopped green onions and black pepper, and ground everything up.

Next I mixed in one egg and one heaping tablespoon of mayonnaise for binders. I would have preferred to use plain low fat yogurt, in lieu of the mayonnaise, but unfortunately I didn't have any on hand.

I then fashioned two paddies and applied olive oil to one side of each burger.

I heated my gas grill, topped with a stainless steel grilling tray, to medium-high heat and grilled both paddies.

I basted the paddies with Kraft's Extra Virgin Olive Oil Italian Vinaigrette Dressing on each side.

And that is how it all went down.

Here are a few pictures of this process...

Tuna Paddies and Oroweat Sandwich Thins bread on the grill.

These paddies are almost ready!!

The condiments have been added.

Finalized with Swiss cheese, tomatoes, green butter lettuce and alfalfa sprouts. We really liked the Oroweat Sandwich Thins for a change of pace and a somewhat health conscious tuna burger.

Of course the theme of this weeks burger was health conscious to a certain extent. After all there are just some condiments that I will not forego. And to top it off this was all served with our veggie fries which were grilled and cut yardlong beans basted with the Kraft's dressing. If you have never tried grilled long beans, you got to give yourself a treat. I prefer this over my other grilling staple of Asparagus.

Well, we had some darn good eats and we are looking forward to next Wednesday when I am going to grill us up some Firehouse Burgers with specially battered onion rings.

Until next time....

Tuesday, July 3, 2012

Pecan Tassies (Tarts)...the perfect snack.


Sometimes your sweet tooth kicks in and sometimes you just got to have some type of pasty. Well, I have the perfect solution for both. Pecan Tassies as they are known on Guam. Also known as Pecan Tarts.

These little jems have that fabulous pecan, butter, vanilla, and brown sugar filling in a fantastic, flaky pastry cup. Talk about tasty and the worst thing is that they are bite sized. A dozen is just not enough.....believe me!!

Well, here is the recipe and instructions....

Pecan Tassies (Tarts)

Recipe version by Lupe (Dydasco) Olivas 

Ingredients: 

For the dough: 

½ cup butter 
1 3-oz. pkg cream cheese 
1 cup all-purpose flour 

For the pecan filling: 

1 egg 
¾ cup brown sugar 
1 tsp vanilla 
Dash of salt 
1 tbsp butter 
½ cup coarsely chopped pecans 

Directions: 

For pastry, in mixer bowl, mix together the ½ cup butter and the cream cheese. 

Add flour and mix well. Set aside. 

Mix into bowl the egg, brown sugar, the 1 tablespoon butter, the vanilla and salt, until smooth and set aside. 

Roll pastry dough into 1 inch round balls and place into an ungreased mini-muffin tray. 

Shape dough in each muffin cup to cover the bottom and sides. 

Spoon about 1 tsp of chopped pecans into each muffin cup. 

Fill each cup up with the egg/brown sugar mixture that you previously set aside. 

Pre-heat the oven to 325 F, and then bake for about 25 minutes or until filling has set somewhat firm. Individual ovens vary with their own specific temp and timing. You know how that goes. 

Remove and allow to cool. 

This should make about 24 tarts. 

You can adjust this recipe to your individual taste. 

Pecan Tassies

This was all that was left of 4 dozen. You know I had to flex my quality control wings...

Do yourself a favor and try these out. And don't forget that ice cold glass of milk.

Until next time.... 

Wednesday, June 27, 2012

Let's Make Some Lumpia!!!!


Lumpia, also known as spring rolls, are an Asian treat that is popular all over the world. These are basically "mini-burritos", Asian style. They can be filled with whatever you want to put in them. And the dipping sauces are as diverse as the lumpia themselves. But one thing is for certain, these little guys are so tasty that once you start in on them you'll find it hard to stop.

Here is a step by step photo tutorial featuring my wife, Lupe....

Chop up you meat into small pieces and stir fry in butter with fresh, minced garlic. Lupe used shrimp and chicken.

Once your meats are cooked add the veggies that you prepared and stir fry them with the meat/seafood. Lupe used carrots, bean sprouts, fresh green beans, and cabbage. These were all thinly sliced. Salt and pepper to taste. You can experiment with the flavor. You might want to try oyster sauce, apple cider vinegar, etc. Come up with your own unique flavor.

Here is the mix all ready to be rolled into the lumpia wrappers.

Here you can see Lupe adding the meat/veggie mixture onto the lumpia wrapper. You can also take note of the type of wrapper Lupe uses.

As Lupe rolls, she also applies a little of the water/cornstarch mixture as a type of glue to keep the wrapper together. This mix is 1/2 cup of water to 1 tbsp of cornstarch. You can always add more cornstarch if you like.

Lupe folds the side in like a burrito and applies the cornstarch to the sides as she goes.

Here is the finished wrapped lumpia. Lupe is applying the cornstarch to the closing flap.

Once you have everything wrapped you can begin your frying. Fry over medium/high heat, turning each lumpia to get a uniform golden brown. Just like fried chicken.

Here is one ready to come out. Lupe allows the excess oil to drain before placing the lumpia in the colander.

Here are the lumpia draining and cooling while Lupe continues to fry the rest.

The finished product with Lupe's sweet and sour sauce. What sauce you use for dipping is up to you. The Vietnamese use a fish sauce base for their dipping sauce and it is excellent.

Of course there are many ways to plate and serve lumpia. On Guam the popular way is the lumpia wrapped in a leaf of Romaine lettuce, with rice noodles, bean sprouts and Vietnamese mint or Thai Basil. This is utterly delicious.

Try making your own. Fresh is best and you will find that it is not as hard as you may think. Once the prep is done, the rest is easy. Word of caution though, make a bunch because once you start eating these delicious, home-made appetizers, you can't seem to stop.

Until next time....

Friday, June 22, 2012

Salmon Salad


Salmon Salad is one of my wife Lupe's favorite salads. And rightfully so. The combination of salmon and fresh vegetables with lemon juice and hot pepper, really drives your taste buds crazy. This is quite an amazing dish. This is the step by step process that she uses to make her tasty dish.

Here is how Lupe does it....

She uses one can of red salmon. She likes to use the Bumble Bee Brand Wild Alaska Red Salmon. 14.75 oz. can. She breaks up the salmon ever so slightly. She likes to maintain big pieces. Later when she mixes everything up, these pieces will break up a little. 

She then cuts the young Japanese eggplant in half, lengthwise. 

Then cuts each piece slightly diagonal and thin about 1/8 inch wide. 

Mixes the eggplant in with the salmon. 

Now chop up the green onions. Amount is up to you.

Add that in the mix. 

Lupe prefers using cherry tomatoes that are a little firm. She doesn't like a soggy salad. Juicy tomatoes will make your salad soggy. 

She slices the tomatoes into smaller pieces. 

Then she adds the tomatoes into the mix. 

Next she cuts up the fresh fioles (frijoles) into small, 1/4 inch chunks. She parboils the fioles for 3 minutes after the water comes to a boil. A raw fiole has a slight bitter flavor and the parboiling neutralizes that. She then adds the parboiled fioles in. The fioles are Long Asparagus beans.

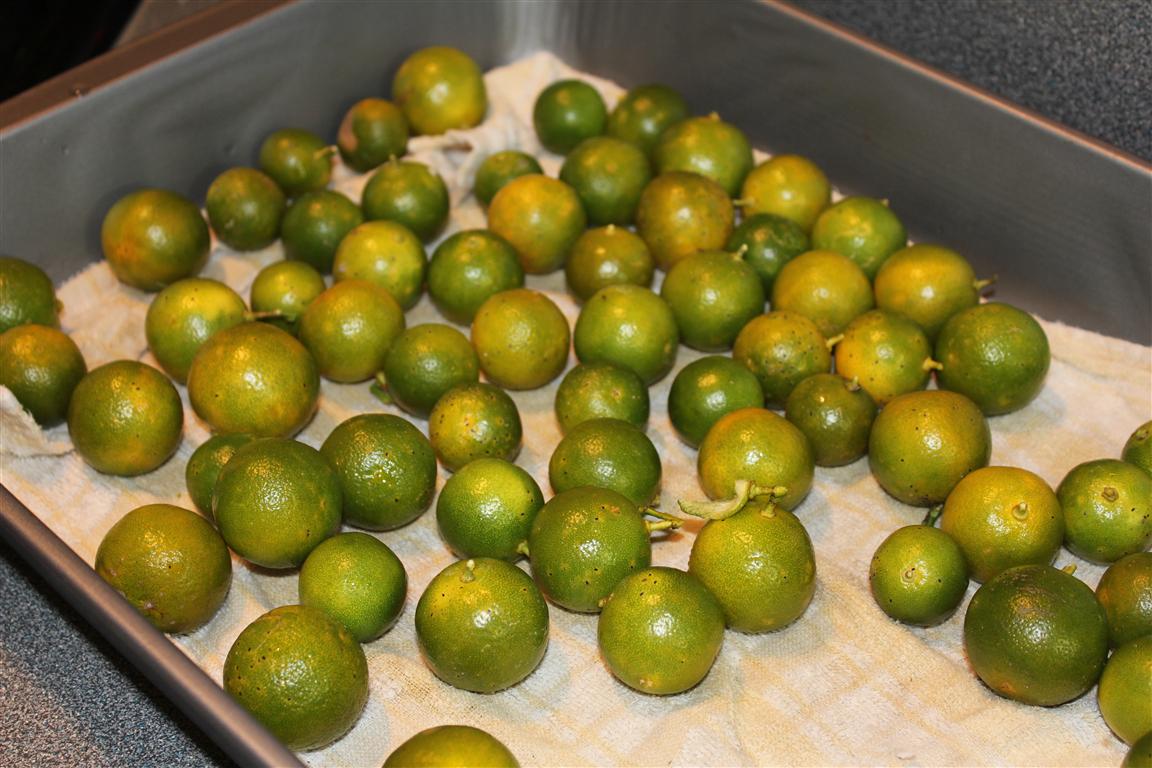
These are the Calamansi lemons that we use. Great flavor!!

Once all the veggies are in, she now adds in about 6 cloves of thinly sliced garlic. Then adds the calamansi juice, diced hot pepper and salt. All these to your individual taste.

She "tosses" this like you would any salad. She is careful not to break up the salmon chunks too small. Let this sit for a while so the flavors can blend. That is if you can resist the temptation of eating it all. 

Heat some corn tortillas up and eat away!! Here is the salmon salad on top of a heated corn tortilla. 

Salmon Salad Taco

That's all there is to it. Quite an easy dish to prepare once you get the hang of it. And this definitely has a lot of flavors going on. Your taste buds are definitely going to thank you.

Until next time....